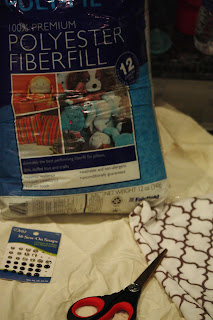
So, here's a peek into one of several Pinterest inspired projects I am doing!
 |
| The seatbelt Pillow! |
My inspiration came from Super Jenn, and it was just the right reason to drag the hubs and kiddos to Hobby Lobby!
Supplies needed: an old pillowcase, poly-fil, fabric of your choice**, scissors, snaps, sew-on velcro, sewing machine!
** The fabric I chose was probably the hardest to work with. (I don't know what it is called, but it is super soft--which is why I originally chose to buy it) Super Jenn used fleece for hers. I think you could use whatever fabric you desire.
***WARNING*** I am by no means "suzy-sews-a-lot". Therefore, follow these instructions at your own risk. My sewing terminology may be flawed. Sorry. I am not liable for any of your own mistakes!
Step 1: cut pillowcase (I cut about 5 1/2" wide and 26 1/2" long) and to be totally honest, I kind of just eye-balled everything :) except for cutting a straight line!
Step 2: Sew up the sides and bottom and stuff with poly-fil or fluff or whatever you want inside, then sew pillow shut.
Step 3: measure fabric to fit around pillow- leaving room for pressing and sewing down your cut edges-to avoid fraying.
Step 4: Sew up long sides and one end.
Step 5: Sew on snaps or better yet spend the money to buy the snap pliers at the store (much less of a headache!) I, however, am a glutten for punishment and sewed them on by hand!
 |
| you can barely see them but there are 2 snaps sewn on the edge- I folded the edge inwards so in theory the snaps will be hidden! |
well, you guessed it...I missed a step! Somewhere between steps 3 &4 I was supposed to sew on four tabs of fabric that would hold the velcro which would enable this fabulous pillow to wrap around the seatbelt! DUH! Please, check out the right way/more complete instructions!
So, because I absolutely REFUSE to rip the seams and start over, I will most likely, painstakingly, sew on more snaps. bummer.
Overall, I am pleased with the outcome. And, if I do say so myself, it's pretty darn cute! (Big TAP on my amatuer
Check back for more of my "Pinnochio Project DIY: Bringing Pinterest to Life" (clever, huh?!) Pin It


